

In today's blog, we'll try to host our backend server on a Virtual machine and try to generate SSL certificates for our server.
Why?

You might've noticed this funny lock on your browser. This means whatever you're communicating with this website like your credit cards, social security number etc it's encrypted and secure. This protocol over which the current internet infrastructure communicates is known as HTTPS. You can read more about it here.
Now to answer 'why?'
Well domains ain't cheap and buying one doesn't make sense if you're building a side/hobby project. And when we try to communicate with your backend servers whose URL looks something like http://3.69.112.420:8080/api/v1/health from a project hosted on netlify/vercel we get an error because HTTP is not secure to communicate. We've all been there.
How?
With a combination of Nginx, LetsEncrypt and sslip.io we'll generate SSL certificates for our hacky backend server.
Don't worry here is a step-by-step guide :
SSH into your server and make sure your backend server is up and running.

Install Nginx on your server
 sudo apt update
 sudo apt install nginx
To check whether it's working run
systemctl status nginx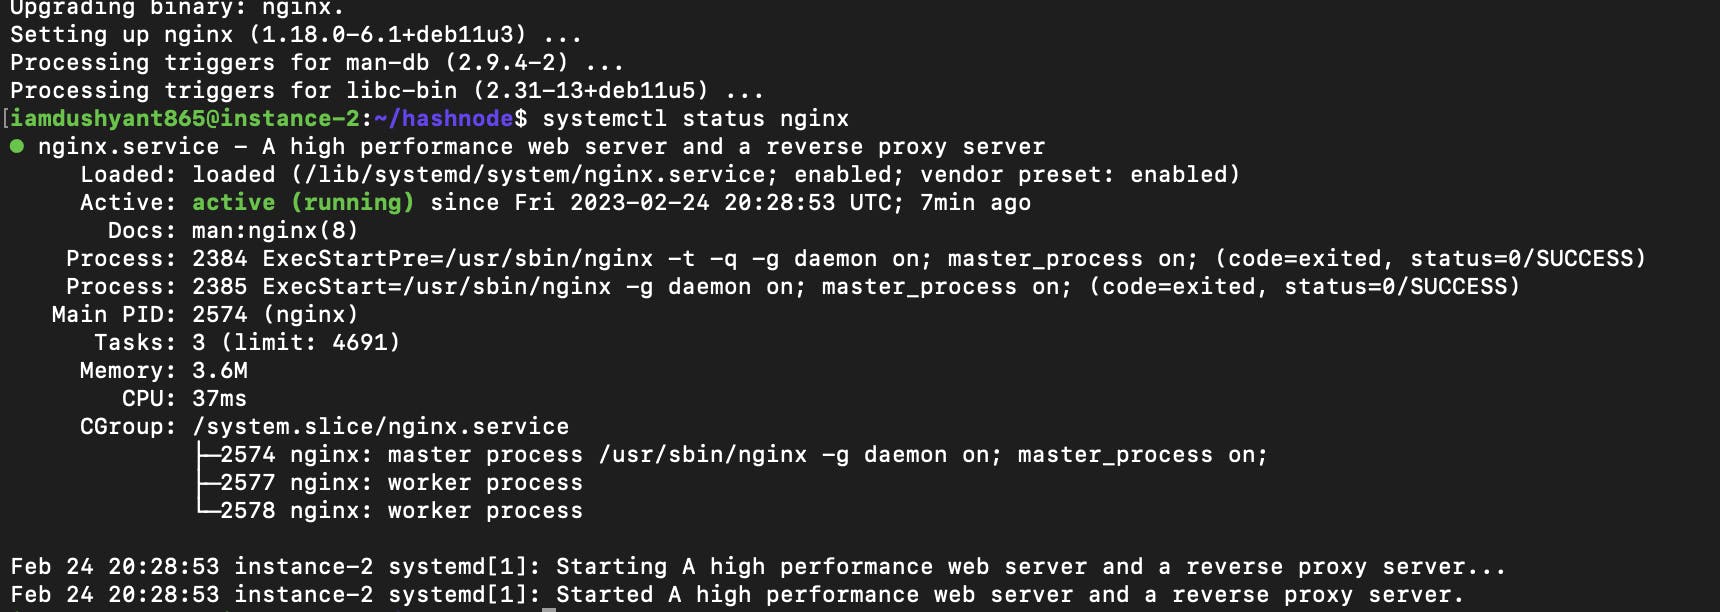
Install certbot and certbot nginx plugin
 sudo apt-get install certbot
 sudo apt-get install python3-certbot-nginx
Obtain your domain name.

But wait now how will you get a domain name for free?
Here comes sslip.io to the rescue. It is a service that provides developers with an easy way to create and test SSL/TLS-enabled applications. It allows you to create a unique hostname that points to your local development environment, which can be accessed securely using HTTPS. So if your VM's external IP was 3.69.112.420 your domain name will be 3.69.112.420.sslip.io
Resolving the above DNS will point to your VM's external IP.Navigate to /etc/nginx/conf.d and create a file with your newly generated domain name with the following naming convention domain-name.conf

Place the following configuration inside it and replace example.com with your domain name.
 server {
     root /var/www/html;
     server_name example.com www.example.com;
 }
Save the file and run the following commands to test the configuration and reload nginx.
nginx -t && nginx -s reloadObtain SSL/TLS certificates by running the following command.
sudo certbot --nginx -d example.com -d www.example.com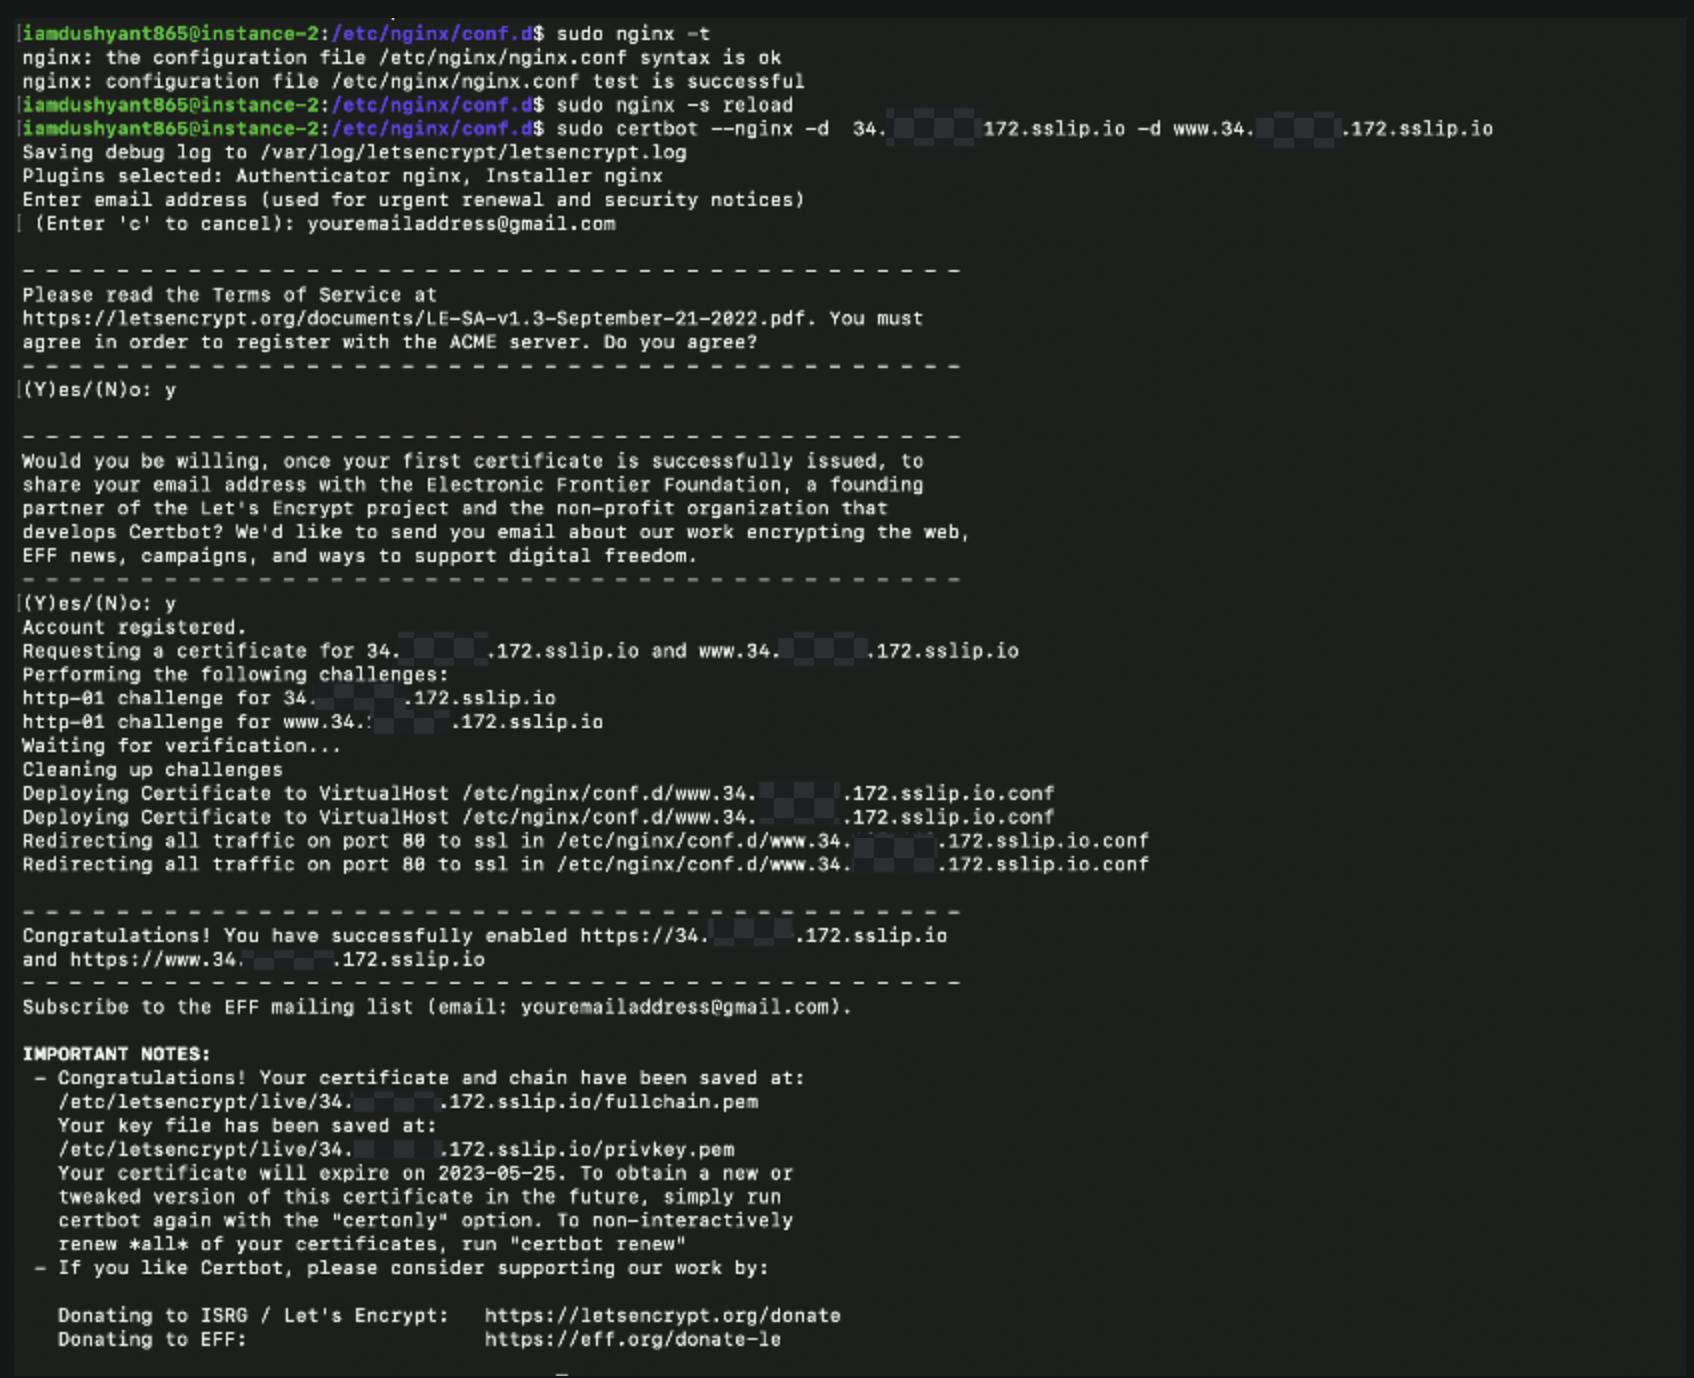
Verify on our browser now and voila! Connection to your server is secured via HTTPS now :D
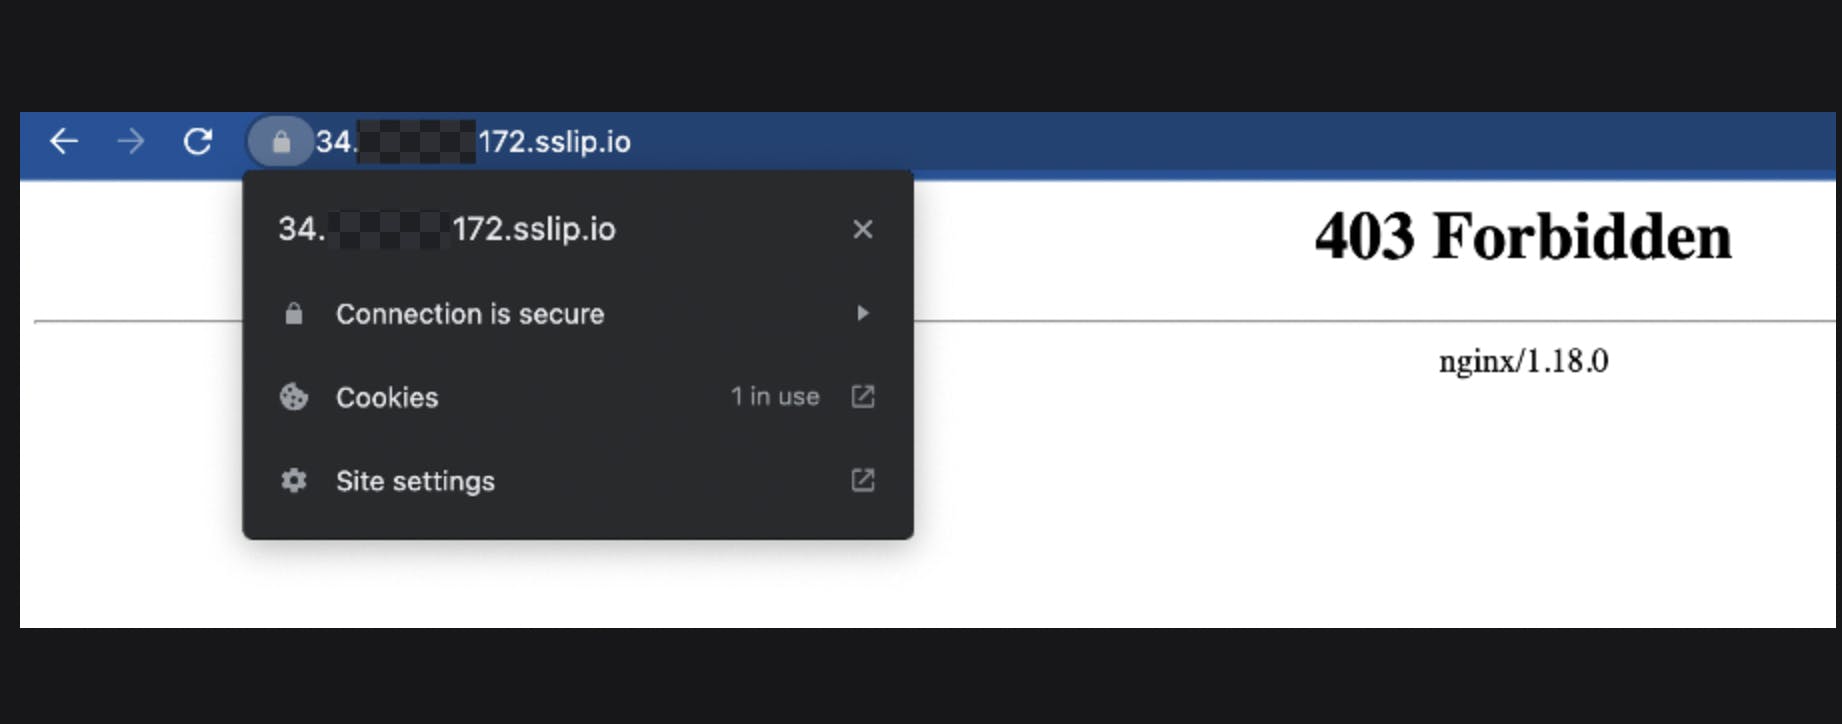
But wait what's that
403 Forbiddenerror we're getting from nginx.
Shouldn't it redirect to your backend app's default route?If you look closely at your nginx configuration we haven't specified the path to nginx where it should redirect to our backend server.
Just go back to the configuration file and add the location block. You can already see that certbot has already modified our file. This configuration is that nginx will actively listen on port 443 for HTTPs traffic and any request which comes with path /api will re-direct that traffic to our backend api server which is running on port 8080.
Save the file and then donginx -t && nginx -s reload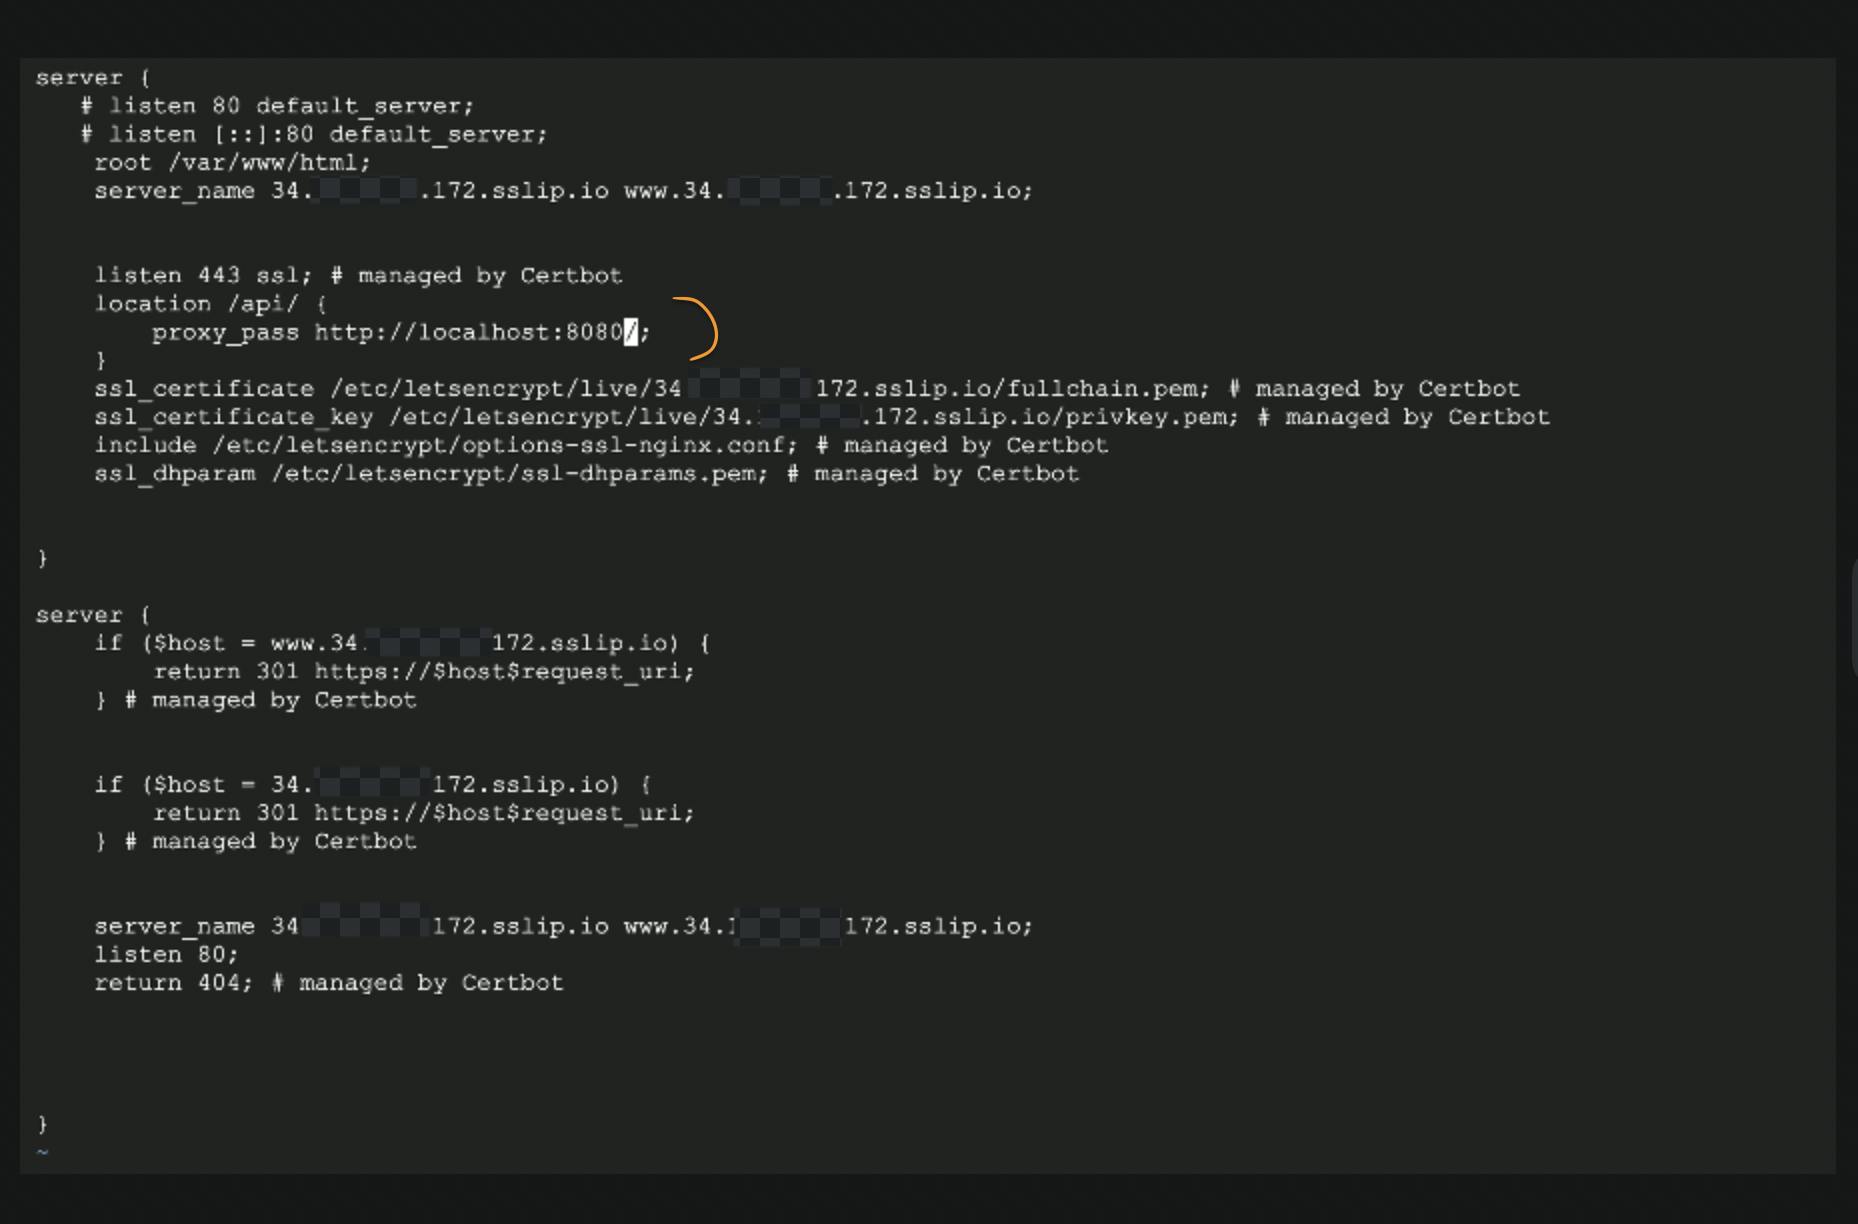
Now let's test again on our browser. Append the path after domain .
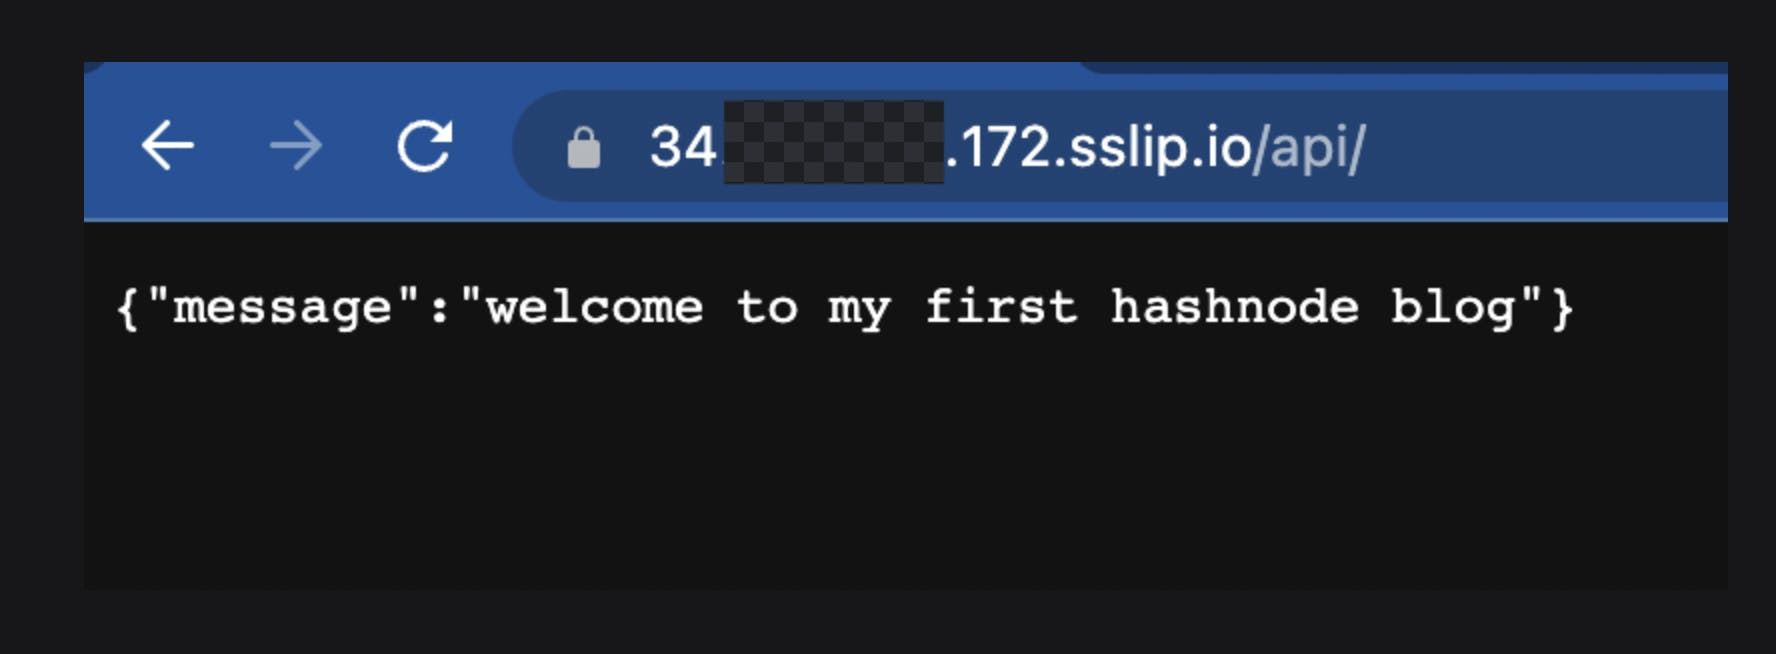
Congratulations , we have now successfully deployed our backend server which listens to HTTPs traffic without even purchasing a domain.
References
https://sslip.io/
https://www.nginx.com/blog/using-free-ssltls-certificates-from-lets-encrypt-with-nginx/
https://www.digitalocean.com/community/tutorials/how-to-install-nginx-on-ubuntu-20-04